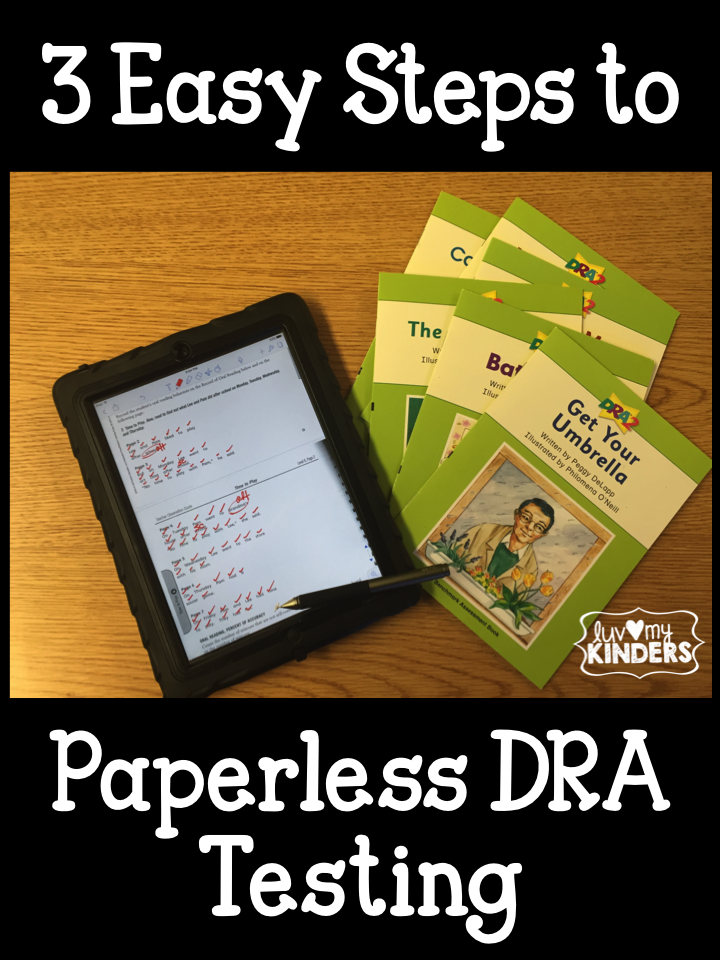
Don't you love giving reading assessments? I am sure most of you are shouting a resounding NO in your mind! I totally agree with you. I love seeing the results when I finish though, and I am always so excited and encouraged by all the growth my kiddos have made. However, the process itself is not my favorite. Well, I am here to show you how you can go paperless, thus making the process a bit easier for you. We use DRA in our school, but you could use this same process with any reading assessment that your school is using.
All you need is access to an iPad, the ability to scan documents to your computer, Google Drive or Dropbox, the app Notability, and you're all set. I promise if I can do it, you can too!

The first step is to get the test recording sheets into your computer. I used my printer and it has the feature, scan to email. I just scanned each sheet in and it was sent to my email. Yes, it was time consuming. However, it will never have to be done again. Each time we test I have to make copies of all the recording sheets and it is time consuming too. Not to mention then you have to file those recording sheets somewhere. Now all my test results are neatly filed in a folder in my Google drive. UPDATE: (I have now discovered that there is a CD with blackline master copies of each test in PDF format. So to save even more time find the disk with your testing kit and save a copy of each test that you need directly into a folder in your Google drive or Dropbox. Then you don't have to combine the pages either, they are already together in one file, so if going this route skip to step 2)
You will want all pages of each assessment in one PDF. I have adobe pro, so I just combined the individual scanned files into one complete file for each level.
You can also scan groups of pages together so all relevant pages are in one document. You need to then save those files to either Google Drive or Dropbox so that you can access them from the app.
Next, you will need to download the app Notability. Yes, it is a paid app at $5.99, but I feel like it is totally worth it, since I use it in many other ways as well. There are some other apps that would do the job as well, one being Seesaw, but I have been using Notability for a few years and was already familiar with it so that is what I use.
Once you open the app you will need to get your DRA tests into the app. Click on Import in the upper right corner, then choose either Google Docs or Dropbox. You can choose multiple documents to upload at one time. Once you have your tests in the app you are ready to begin.
Tap on the test you need to give and then tap on the title of the document and add the student's name that is being tested. This will make it easy to save and keep organized. Then administer the test as you normally would except that you will be making your notations on your iPad. I use the Adonis Jot Pro Fine Point Stylus (
click here if you need it) as it makes a fine line which makes it easier to make notations on the form as opposed to a regular stylus.
You also have the option of recording the student reading during the test. Just click on the microphone in the upper right corner.
Once the test is complete and you have scored the student you will need to save it by sending it back to your Google Drive or Dropbox. Just click on export and choose where you want the document sent. Now it is saved in my drive with the student's name in the title, since I added the name prior to giving the test.
Now that I am ready to move on to another test level or another student, there are a few options. You can import a blank test again from your Google Drive/Dropbox or what I currently do is just quickly use the erase feature in the Notability app. Then after it is erased I just click on the title and put in the new student's name.
There you have it! I am loving using this paperless system to test my students. It is so much easier to prep for test giving and it is so much easier to file and track the data since all of my tests are saved in one digital location. Not to mention, I can easily and quickly share those results with administration or additional teachers. If you have any questions regarding the process or getting started I am happy to answer them. Just leave me a message below or email me via the contact tab at the top.
Have a great week and a fantastic end of the year!